“What Pressure Do I Pre-charge My Hydropneumatic Tank To?”
/
By Chris Edmondson
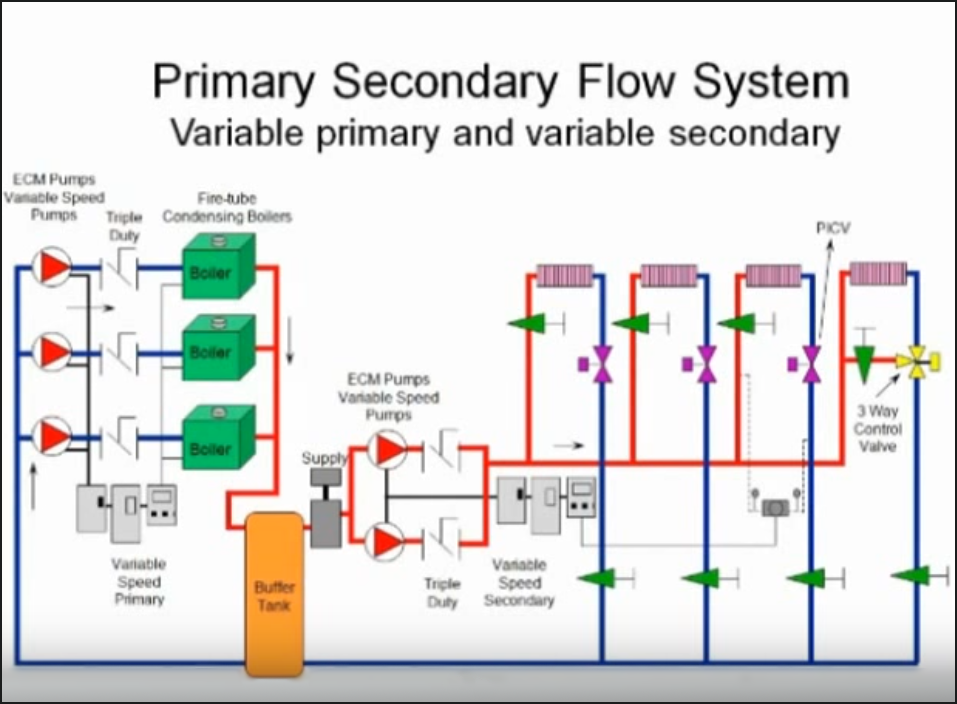
In our last blog we talked about how to properly size a hydropneumatic tank – but the engineer’s work doesn’t end there. He or she also needs to specify the appropriate pre-charge on the drawings. Otherwise the tank will not be set properly at start-up and will not provide the intended energy savings.
Remember that hydropneumatic tanks are shipped from the manufacturer pre-charged to a pressure level that is typically well below what the pre-charge should be at operation, which is why the proper pre-charge should be indicated on the plans.
As a rule of thumb, the pre-charge on the tank should be 10 psi less than the initial pressure at the tank. In many applications the tank is at the same elevation of the pressure booster but keep in mind if the tank is located at a higher elevation the initial pressure will have to be lowered accordingly. This makes certain that there won’t be any sudden drops in pressure between the time that all the water is drawn out of the tank during no flow and the time it takes for the pumps to come back on again.
Remember the Relief Valve!
Don’t forge that per the International Plumbing Code (ICC) every pressure tank in a hydropneumatic pressure system must be protected with a pressure relief valve. This valve should be set at a maximum pressure that is equal to the rating of the tank and should be installed on the supply pipe to the tank or directly on the tank. The relief valve must be installed so that it discharges by gravity to a safe place of disposal.
Finally, the installer should make sure the tank is disconnected with the system connection open to atmosphere for the tank pre-charge! For more information about this and other mechanical systems topics, please visit the JMP library of online training videos!